
User Management in Sell.do: Users, Teams, Attendance and Hierarchies
Updated 31 Jul 2026
User Management in Sell.do helps administrators create, update and deactivate users; organize teams; manage daily availability; and maintain reporting hierarchies.
Access: These settings are available to users with the Admin role and Support Manager accounts.
1. Manage users
Access the Manage Users section
Navigation path: Home > Setting Management > User Management > All Users
Direct link: Sell.do User Management
Before creating a user
Keep the following information ready:
- Full name
- Email address
- Phone number
- Team and sub-team assignment
- User role
- Department information
Create a new user
- Click the blue New User button on the right side of the screen.
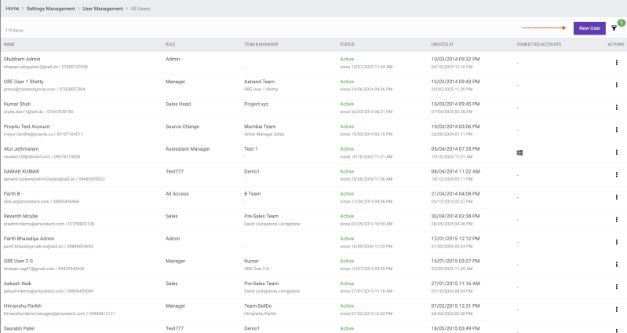
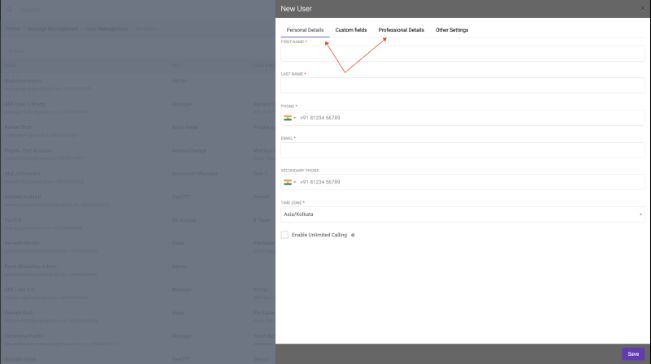
- Complete the Personal Information section, including the user's name, email address and phone number.
- Complete the Professional Information section, including the team, department and every field marked with an asterisk (*).
- Click Save at the bottom of the form.
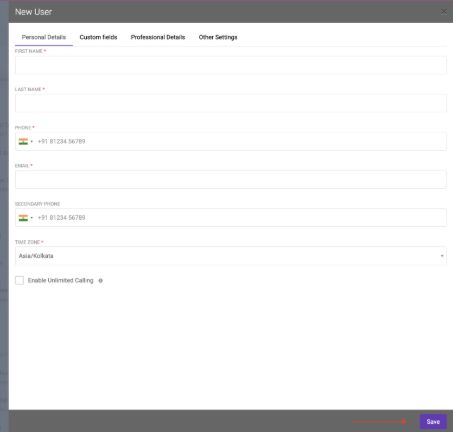
- The new user will appear in the user list.
Understand user status
- Unconfirmed: The user has been created but has not verified the account through the confirmation email. This status can also appear when a new email address is added to an existing user.
- Active: The user has successfully activated the account.

Edit an existing user
- Locate the user in the list.
- Open the three-dot menu beside the user's name and select Edit.
- Update the required details on the user profile page.
- Click Save to apply the changes.

Deactivate a user
Deactivate the account when a user leaves the organization so their leads can be reassigned to an active team member.
- Locate the user in the list and open the three-dot menu.
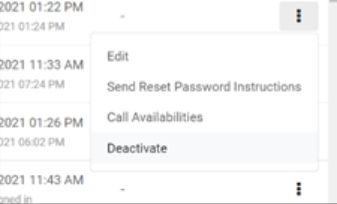
- Select Deactivate.
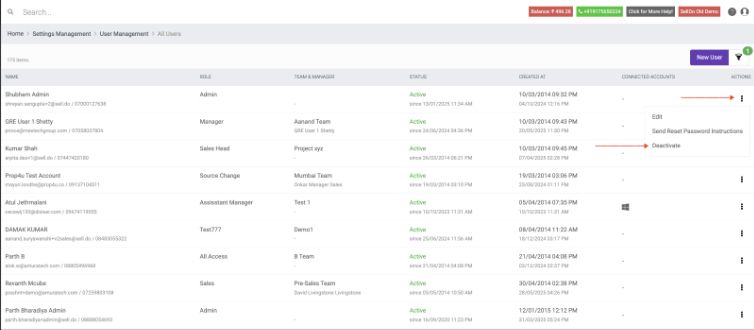
- If the user is included in routing rules or configured as a fallback user, remove or replace the user in those configurations when prompted.
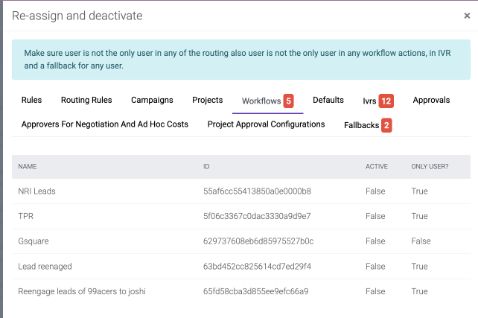
- In the reassignment form, choose an active team member to receive the user's leads.
- Click Deactivate to complete the process.
Note: Deactivating a user does not delete the account. The user remains in the list with the status Deactivated, and the account history is retained.
2. Manage teams
The Manage Teams section lets administrators create, edit and deactivate teams so users can be grouped according to the organization's operating structure.
Access the Manage Teams section
Navigation path: Home > Setting Management > User Management > All Teams
Direct link: Sell.do Teams
Create a team
Keep the following information ready:
- Team name: The name of the team.
- Team hierarchy: The reporting structure in which the team will be placed.
- Associated team: The parent team, if applicable.
- Click the blue New Team button on the right side of the screen.
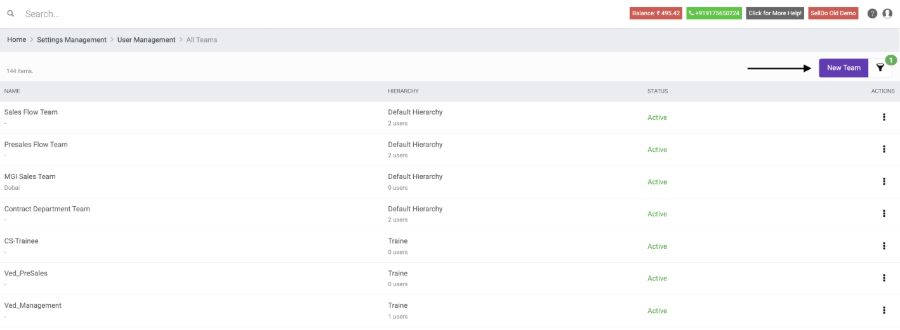
- Enter all required team details.
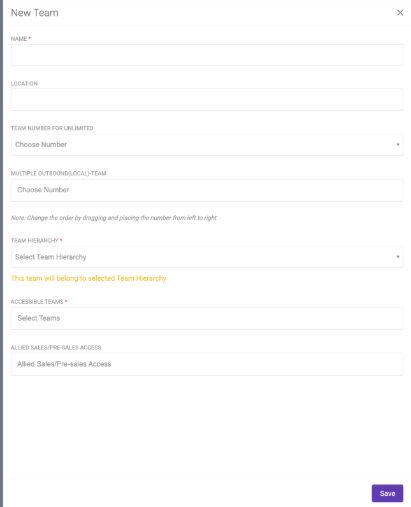
- Click Save.
- The new team will appear in the team list.
Edit a team
- Locate the team in the list.
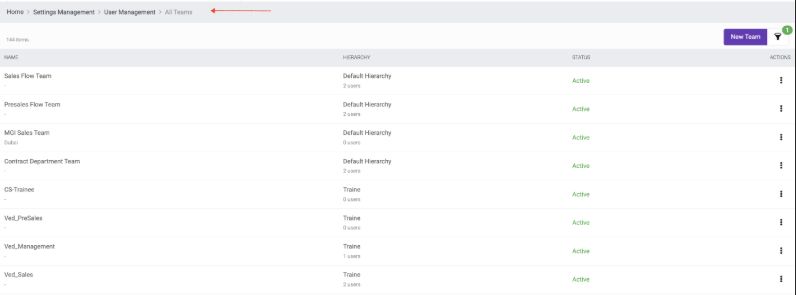
- Open the three-dot menu beside the team name and select Edit.
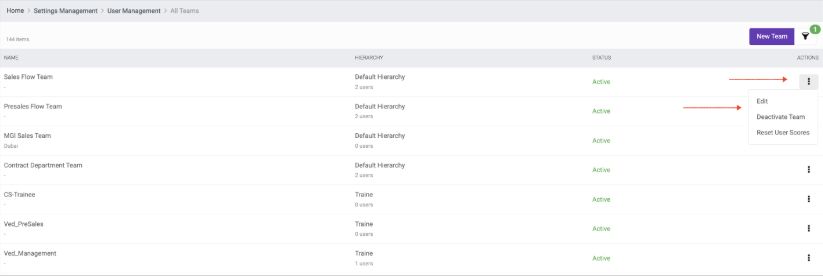
- Update the required details on the Team Profile page.
- Click Save to apply the changes.
- The updated information will be reflected in the team list.
Deactivate a team
Before deactivating a team, confirm that no users are assigned to it. Check the Hierarchy column for active users.
- Locate the team in the list.
- Open the three-dot menu beside the team name and select Deactivate.
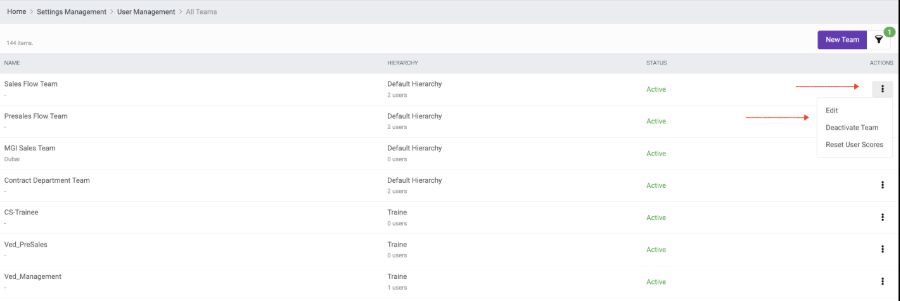
- If no users are associated with the team, confirm the deactivation.
- The team will remain visible in the list with an Inactive status.
Note: Deactivating a team does not delete its historical data.
3. Manage attendance and availability
Attendance and Availability lets you mark a user as available or unavailable for a particular day. When a user is unavailable, a fallback user can handle their leads so follow-ups continue without interruption.
Access Attendance and Availability
Navigation path: Home > Setting Management > User Management > Attendance and Availability
Direct link: Sell.do Attendance and Availability
Required information
- Fallback user: The user who will manage leads during the period of unavailability.
- Availability status: Whether the user is available or unavailable.
Mark a user as available
- Locate the user in the list.
- If the user's status is Unavailable (red), click the toggle.
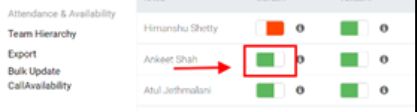
- The toggle will turn green, indicating that the user is available.
Mark a user as unavailable
- Locate the user in the list.
- Click the green availability toggle to change it to red (Unavailable).
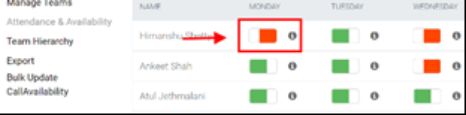
- In the dropdown that appears, select a follow-up or fallback user.
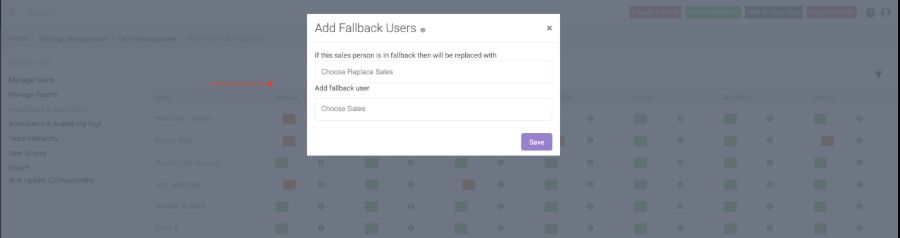
- Confirm the selected user so lead follow-ups continue during the absence.
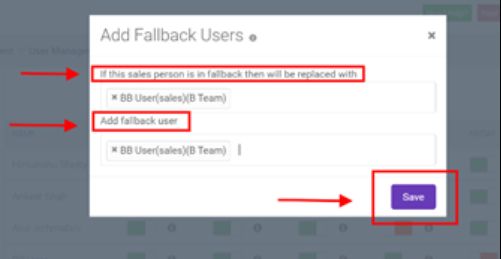
- Click Save to confirm the changes.
Key considerations
- The fallback user temporarily manages the unavailable user's leads.
- Availability can be updated at any time.
- Keeping this setting current helps prevent missed lead follow-ups.
4. Manage team hierarchy
Team Hierarchy lets administrators create a superior structure for managing and monitoring users across designated teams.
Access Team Hierarchy
Navigation path: Home > Setting Management > User Management > Team Hierarchy
Before creating a hierarchy
- Hierarchy name: The name of the new team hierarchy.
- Team assignment: The teams to include in the hierarchy.
Create a team hierarchy
- Open the Team Hierarchy section.
- Click the blue New Team Hierarchy button on the right side of the screen.

- Enter the hierarchy name and select the required team assignment.
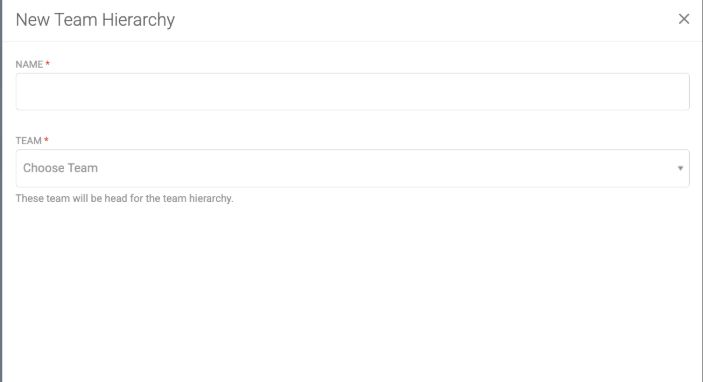
- Click Save. A flowchart-style representation of the hierarchy will appear.
- To add child teams, click the red plus sign in the hierarchy and select the required teams.
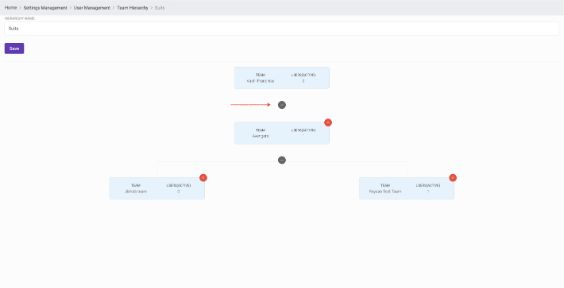
- Click Save again to finalize the hierarchy.
Edit a team hierarchy
- Locate the hierarchy in the list.
- Open the three-dot menu on the right side of the hierarchy.
- Select Edit.
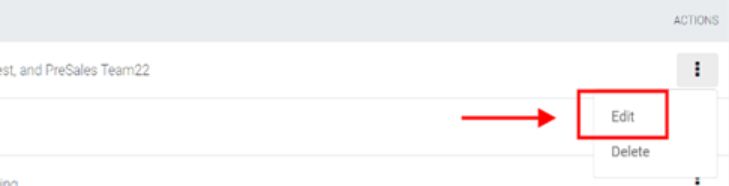
- On the hierarchy page, review the current structure.
- To add a child team, click the red plus sign and select the required team.
- To remove a child team, click the red cross sign beside the team name.
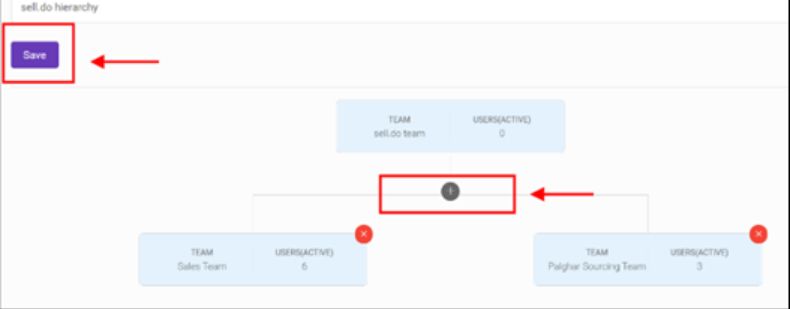
- Click Save to update the hierarchy.
Delete a team hierarchy
- Locate the hierarchy in the list.
- Open the three-dot menu at the end of the hierarchy entry.
- Select Delete.
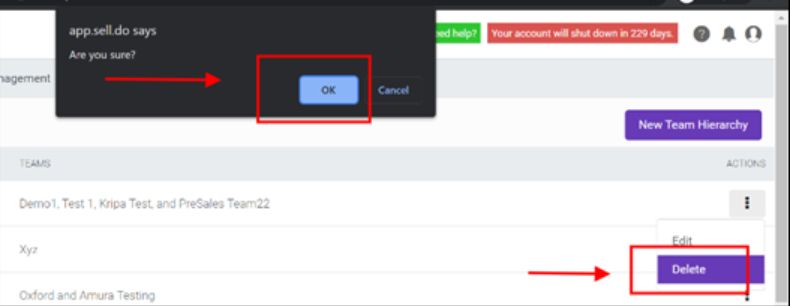
- When the confirmation message appears, click Yes to permanently delete the hierarchy.
Important notes
- Deleting a hierarchy permanently removes it from the system.
- Before deleting, ensure that no active users depend on the hierarchy.
- Changes to a hierarchy affect team structure and reporting across the system.